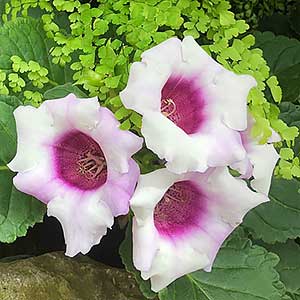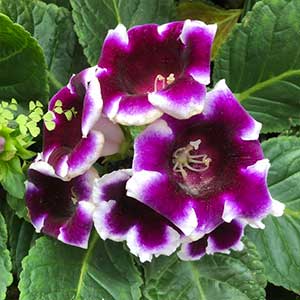
With colourful flowers often found in florists, Gloxina are Sinningia speciosa hybrids and are mainly from as indoor plants.
Large textured foliage and also large flowers you will find Gloxinia as the star attraction in many greenhouse displays.
The flowers vary in colour and being large and bell shaped, they also point upwards making then a great plant to use at lower levels.
If you happen to live in a tropical climate, you can grow them year round, in cooler climates that are treated as annuals or indoors plants.
You can grow Gloxinia from seed planted indoors near the end of winter, plants are difficult to find, so seed is easier for most gardeners.
Gloxinia Varieties
Two different plants are available that carry the common name Gloxinia, those that are commonly called ‘Hardy gloxinia’ and those that are the ‘Florists’ type, or Sinningia speciosa hybrids.
The hardy ones are actually Incarvillea delavayi and they are perennials that will grow in cooler conditions although you can grow them form seed in much the same way.

Care
Most of the colourful hybrids are treated as annuals, they will flower freely for 6 – 8 weeks, however once they die back, they usually will not survive to the next year.
To keep them looking good for a long as possible try the following basic care steps.
- Choose a bright position however not in direct sunlight.
- Keep the temperature in a range from 15C to 25C.
- Water from below and never water the leaves. This prevents marking and fungal problems.
- Do not allow the soil to dry out, however also do not allow the soil to get wet and soggy.
- Fertilise every week with 50% high phosphorus liquid fertiliser.
You can grow Gloxinia outdoors, however they need a warm sheltered position. They are ofet grown outdoors in tropical to sub tropical zones. In cooler zones, overnight low temperatures can kill them.
Growing From Seed
Most Gloxinia are propagated from seed, this is how we suggest you go about planting the seeds.
- The main issue with growing Gloxinia from seed is damping off, so a sterilised potting mix is recommended. You can buy this at good nurseries or make your own by placing normal potting mix on a tray in the oven for 1 hour at around 200C.
- The sterilised potting mix needs to be put into clean (sterilised) trays. Smooth of the surface gently and spread the seeds evenly on top.
- Do not cover the seeds with potting mix.
- Use a system of watering from beneath, this help prevent damping off.
- Seeds can be placed in a bright indirect light or beneath grow lights.
- The seeds should germinate within two weeks.
- The plants will form an underground corm and then proper leaves. You do need to wait until the true leaves have formed before transplanting.
- The corms and leaves need to be lifted gently from the propagating tray. Try using a fork for this. The idea is not to damage the corm or roots.
- Once transplanted into individual pots, keep them in good bright indirect light and continue watering from below.
It is possible to grow them from leaf cuttings as well, this works best with the older varieties.
