Growing garlic gives you the tastiest and healthiest product for use in the kitchen. In most areas of Australia, it is easy to grow in a good soil in a sunny position.
Garlic does like a cold winter. If you know when to plant and when to harvest garlic is easy to grow.
Questions we are asked about how to grow garlic are :
- How do you grow garlic from cloves ?
- When do I plant garlic ?
- How deep do I plant garlic ?
- Can you grow garlic in pots?
- What sort of soil does garlic prefer.?
- Can I grow garlic from the store, or supermarket?
Answers to these six common garlic growing questions are :
- How to grow garlic from cloves.
Divide the bulb into individual cloves and plant, as described in detail below.
Make sure you keep as much of the base of the clove as possible. - When do I plant garlic
Any time after the start of Autumn, Early winter is good. - How deep to plant the garlic cloves.
Plant individual cloves around 4 – 5cm deep, pointy end up.
This is assuming that you have dug the soil over well. The soil will sink down around the clove a little when you water it in. - Growing garlic in containers. – See the Video below.
Use a container that is around 25cm deep.
Make sure it has good drainage holes.
Use a good quality potting mix.
Plant cloves around 10cm apart
Make sure the pot does not dry out over winter. - Soil for Garlic.
Garlic prefers a soil that is light, lots of organic matter and is ‘sweet’. Also well drained.
Dig in some well rotted manure around 6 weeks before planting.
Add some lime to the soil about 2 weeks before planting. – However it is very tolerant of soil types. - Store bought garlic, will it grow.
Yes, unless it has been treated by growth inhibitors. So forget SOME of the imported stuff. The rest should grow.
Try some from the local farmers market instead….
More about growing garlic.
Garlic is a plant that grows well in areas with a cold winter and a warm to hot summer.
In Australia garlic grows well in large areas of temperate southern Australia. The cold winters seem to be a major factor in growing garlic with good flavour.
In terms of soil and sun, a well drained soil and a sunny position is best. This a crop that takes a good 6 months to grow and produce those large firm bulbs with great taste. Garlic does not require fertilisers to push it along, and although it will grow in warmer climates the flavour will not be as intense.
It is the ideal crop for organic gardening enthusiasts, if you are considering growing your own garlic you will find it is one of the easiest plants to grow in the home garden.
You can grow it in the vegetable garden, put a few plants in the ornamental garden, grow it in a container or a raised
Bulbs are available for sale online from late summer to autumn and you need to be quick if you wish to order some of the rarer garlic varieties available for sale.

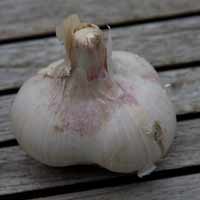
Garlic from organic bulbs (above) are suitable for dividing into individual cloves for planting
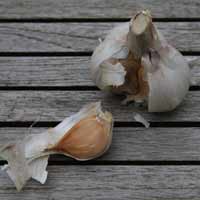
Individual cloves are easily separated, planted (pointy end up)
Organic Garlic
Growing organic garlic bulbs is achieved by buying certified organic garlic and then by planting garlic in autumn. Planting Garlic bulbs in a well dug soil with a little added lime dug in 4 weeks before planting is probably the best way to produce a good crop of garlic for home use.

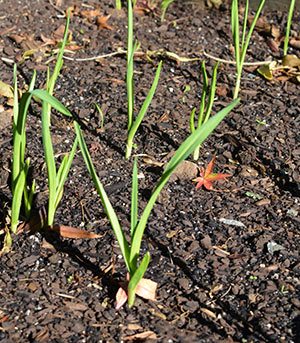
Given a warm sunny position garlic is easy to grow. Cloves that have not been treated can be saved and planted in the garden and these can be obtained from online suppliers or from organic suppliers. Remember that garlic plants will grow to be 2/3m and more tall.
How to Grow Garlic – Summary Information
- Garlic is best planted in Autumn.
- The colder the winter the stronger the garlic.
- Try an established garden bed that had manure and compost added the previous year.
- Dig in a little lime 4 weeks before planting.
- Try a well cultivated soil to allow the garlic plant roots to go deep, a sunny position.
- Plant garlic cloves 4 – 5 cm deep, 10 – 15cm apart.
- Mulch around the stems to keep the soil moist.
- Water garlic plants in drier months up until December or when the first leaves start to change color.
- Harvest when the bottom half of the leaves turn brown, but the top half are still green.
- The colder the winter the stronger the garlic.
Weed prevention in the garlic patch ?
Look for a product called ‘Weed Gunnel’, it is a water and air permeable weed matt that is also degradable and is suited to organic growing methods.
How and when to Harvest Garlic.
Garlic is best harvested in summer once the leaves have begun to die back. Stop watering as soon as the lower leaves begin to turn brown and then wait a week or two, the top leaves will still be green, but the lower leaves will be brown. We look at how to harvest, cure and store garlic in a separate article.
Growing bigger garlic bulbs
Every one would like to know how to grow bigger garlic bulbs, and depending on the variety you can help them along by cutting the scapes off at the right time.
The scapes that appear on garlic are the beginnings of the flower head, and removing them has a few benefits.
Now this applies to hardneck garlics, and they will send up the scape and it will make a loop
When garlic is growing you will find that a few months before it would normally mature that it begins to send up a flower stem, this is called the scape.
We cut the scape because this will help increase the bulb size, and they are also edible. The time to cut them is when they are formed and just as they are starting to curl upwards.
Don’t remove any foliage, just cut the scape stem as far back as you can without removing the leaves.
As for timing, this will vary according to the season, your locality and the aspect, scapes will also form at different times on plants in the same patch, so visit every week or so.
